
Boomi Run-time:
Atoms/Molecules are the runtime engines where we will deploy all our processes. These run-time engines are required for any environment which is selected based on the required runtimes.
Boomi supports Cloud/Local environments.
Why Local Run-time:
If you have any of the below requirements, you must choose Local runtime only over the cloud:
- If you have any on-premise application, you have to choose local runtime only as cloud atoms won’t access on-premise systems due to firewall issues.
- For more data security as it is completely maintained within your company server.
Local Atom Installation:
You can install the local runtime (Atom) in any system, but you must have admin access to the system where you want to install the Atom. Let’s follow the below steps to install the Local Atom:
- Log in to platform.boomi.com account in which you want to install local atom from the system you want to download and install.
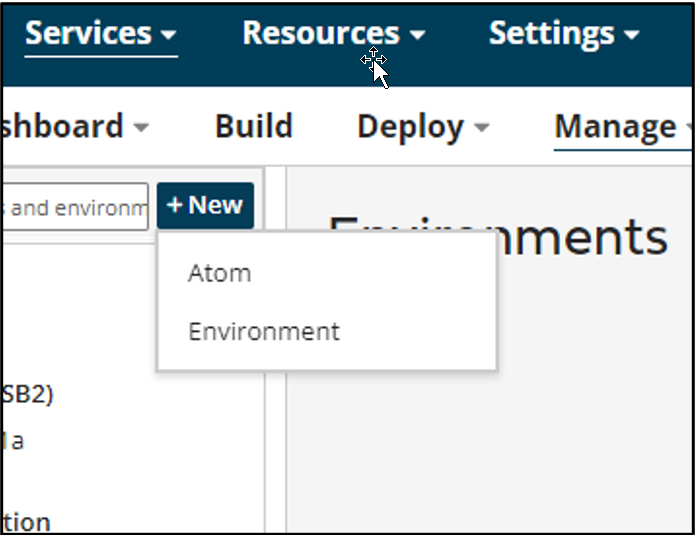
- Navigate to Management à Atom Management and click on New à Atom as in the below image.
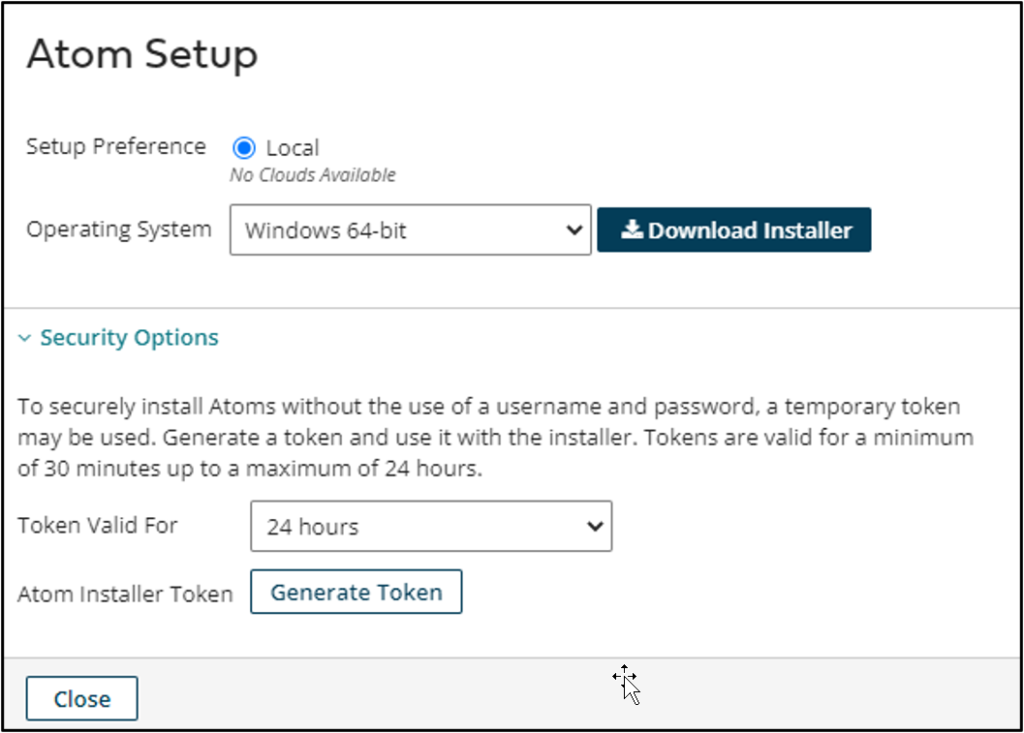
- Then you have to select local Atom and choose the corresponding Operating System and the mode of authentication which will be useful in the installation process. Then you have to generate a token, copy the same and click on the downloaded installer. You can also set the validity of the token here with a minimum of 30min and a maximum of up to 24 hours.
- Once the file is downloaded, run the file as administrator and grant permission. Then start the installation process and choose the directory or leave it as the default directory if you don’t have a specific directory. Then enter the atom’s name and the token which you copied earlier in the Token field so that it will validate and connect this local atom to that Boomi account.
- Once it is successfully connected, it will retrieve the list of environments in that account, then we have to choose for which environment we want to attach this Local Atom. Once you select this, click on next continue, followed by Finish.
- Now login to the same platform account and in Atom Management you can see the new local atom you created under its attached environment.
- This is how one can easily download, install and set up the Local Atom.
Cover Photo by Terry Vlisidis on Unsplash