
A lot of times businesses need to track changes for a field on an Object. By setting field history tracking in Salesforce, users are able to see information regarding who has made what changes to a field and at what time.
How to Set Up Tracking
- Go to Setup, click on Object Manager, and select the Object. For example, Account (1).
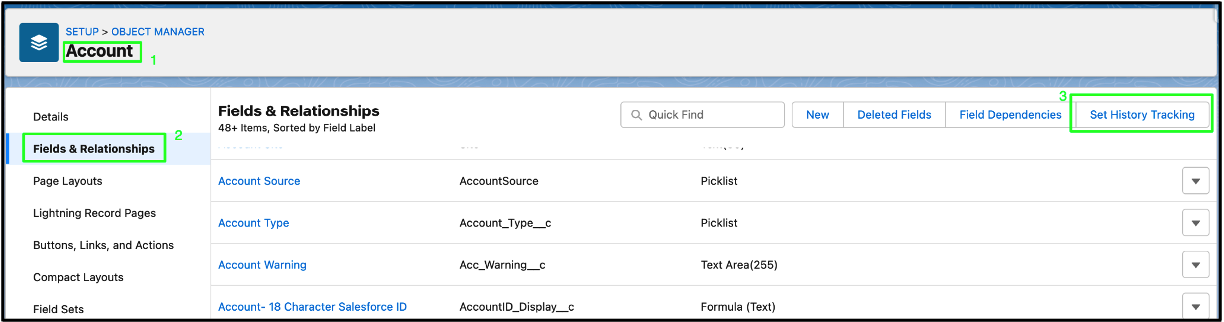
- Click on Fields & Relationships (2), and then click on the Set History Tracking button (3).
- Click on Enable Object History, then select the set of fields you need to track. For Example, Account Name, Account Number.

- Then click Save.
View the Field History
To see the field’s history, you can go to the specific Object’s record, such as an Account record, and observe the Related Lists. The object’s history-related list, such as Account History, is going to be one of the lists that are displayed. You can see all the values that have been changed in the list.

Conclusion
As mentioned in the article above, you can set up history tracking for particular fields that need to be tracked. By doing so, you ensure that the system is secure and no one can make changes to a record without being noticed in the system. This also helps in debugging some processes in the system.
For other helpful Salesforce information, check out some of my other posts below!
Additional Resources
- Troubleshooting Access Issues
- Deployment Strategies and Best Practices
- Salesforce Help: Field History Tracking
Cover Photo by Suzanne D. Williams on Unsplash