In two recent posts, we discussed Business Hours and how they can be used to assist the support team by displaying their availability and by corresponding with automation and escalation processes. Holidays in Salesforce are similar to Business Hours in that they also specify the support team’s availability, or in this case unavailability, and can be related to business hours and suspend escalation rules and entitlement processes.
Let’s walk through creating Holidays and adding them to Business Hours with a few examples.
Note: To follow along with the steps below, use or create a Playground from Salesforce Trailhead or a Developer Edition org.
Holidays Example
1. In your Salesforce org, click the gear icon in the top, right corner to open the Setup menu.
2. In the Quick Find search box, search for “Holiday” and click to open the selection.
3. Click “New” to create a new Holiday. 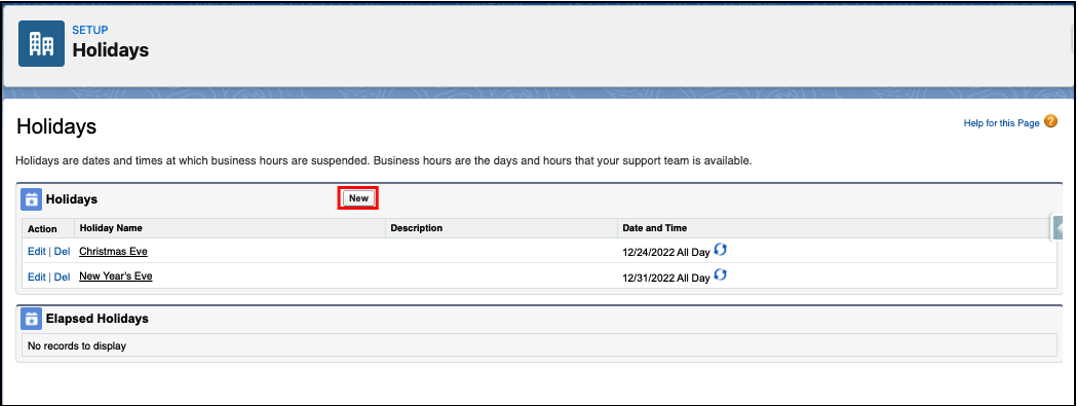
Note: When an elapsed holiday shows in the Elapsed Holidays list, users can also select “Clone” to copy a previous holiday – when no elapsed holidays exist, this selection is not available.
4. Enter the following information for the Holiday:
- Holiday Name: Christmas Day
- Skip Description
- Date: 12/25/[this year], ex: 12/25/2022
- Time: check All Day
- Recurring Holiday: check
In our example, we are entering Christmas Day as the holiday, which occurs every December 25th, so we have checked the box for a Recurring Holiday. As a result, an additional section appears where we can confirm the schedule of the recurrence. Select:
- Frequency: Yearly, On every December 25
- Recurrence Start: 12/25/[this year], ex: 12/25/2022
- Recurrence End: check No End Date
5. Click Save. 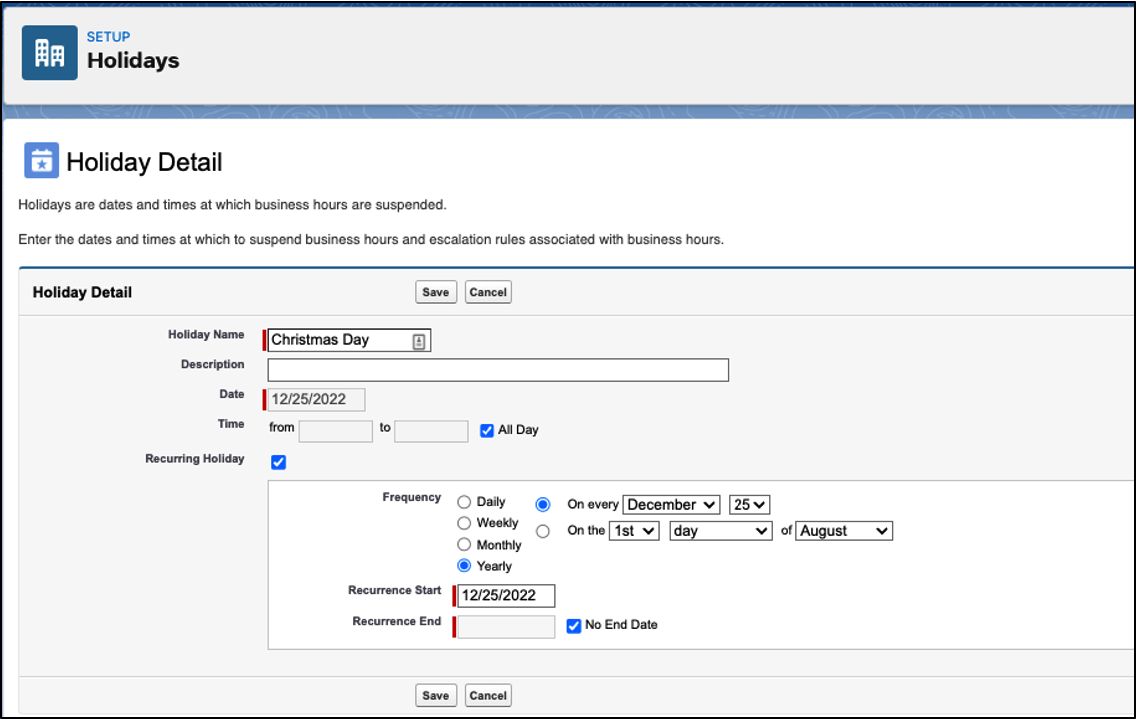
Another Recurring Holiday Example
We are brought back to a page that displays the Holiday we just created. Let’s create another Recurring Holiday example for a holiday that doesn’t have the same date each year.
1. Click “Holidays” in the left sidebar to navigate back to the list of holidays.
2. Click “New” in the Holidays list to create another Holiday.
3. Enter the following information for the Holiday:
- Holiday Name: Martin Luther King Jr. Day
- Skip Description
- Date: 1/16/2023
- Time: check All Day
- Recurring Holiday: check
In our example, we are entering Martin Luther King Jr. Day as the holiday, which occurs annually on the 3rd Monday of January. As a result, when we check Recurring Holiday an additional section appears where we can confirm the schedule of the recurrence. Select:
- Frequency: Yearly, On the 3rd Monday of January
- Recurrence Start: 1/16/2023
- Recurrence End: check No End Date
4. Click Save.
Associate Holidays with Business Hours
Once again, we are brought back to a page that displays the Holiday we just created.
1. From here we can associate the Holiday with active Business Hours by clicking “Add/Remove” in the Business Hours list. 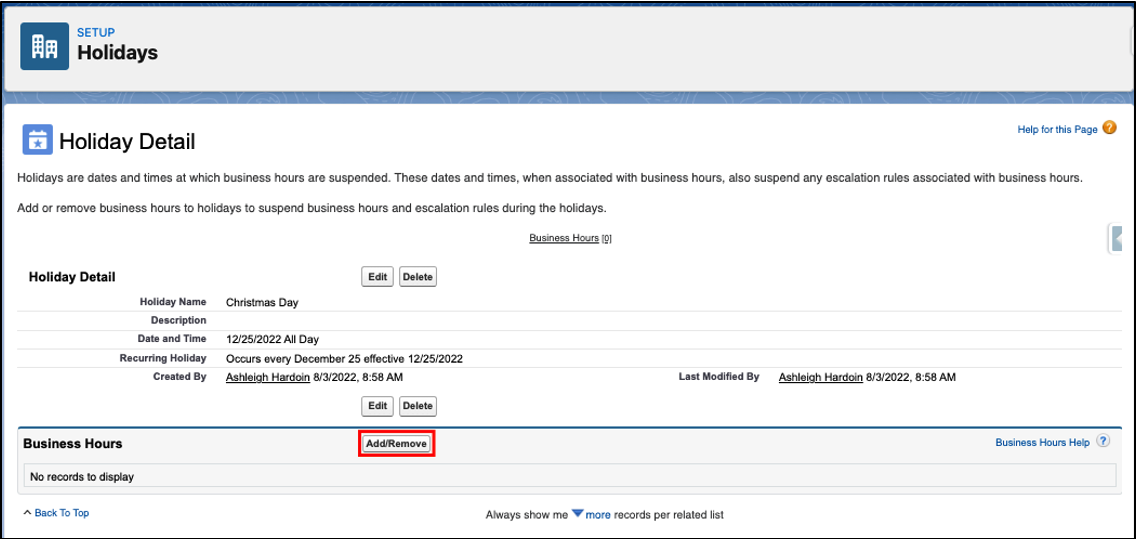
Note: Only active hours will display in the Available Business Hours list. Use the Add arrow button to select active, Available Business Hours that the holiday should be associated with. The hours will move to the Selected Business Hours column.
2. Click Save. 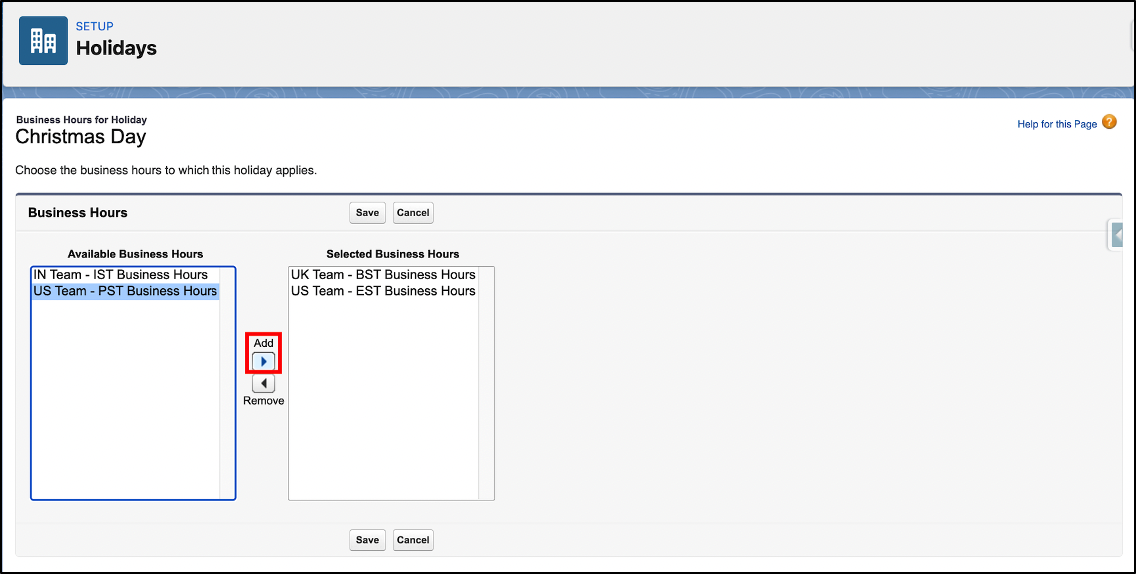
3. Click “Holidays” in the left sidebar to navigate back to the list of holidays.
4. Select a new Holiday, then click the “Add/Remove” button in the Business Hours section to associate this Holiday with active Business Hours as well.
Now, when our Business Hours with associated Holidays are selected on a Case, the escalation rules and the entitlement processes and milestones will take the specified Holidays into account.
Additional Resources
- Salesforce Business Hours
- Salesforce Business Hours pt. 2
- Salesforce Help: Set Up Support Holidays
- Salesforce Help: Guidelines for Creating Support Holidays
Cover Photo by Ray Hennessy on Unsplash