
In the last post, we created new Business Hours for our example Salesforce organization. Now, let’s add the business hours to the Salesforce Case Layout. This will allow support users to set the correct hours for cases and other users to view the business hours.
Add Business Hours to Case Layout
- In Setup, click Object Manager, and then select “Case”.
- Select the Case Page Layouts section, and select “Case Layout”.
- Drag the Business Hours field from the available selections at the top of the screen to where you’d like the field to display on the page layout.
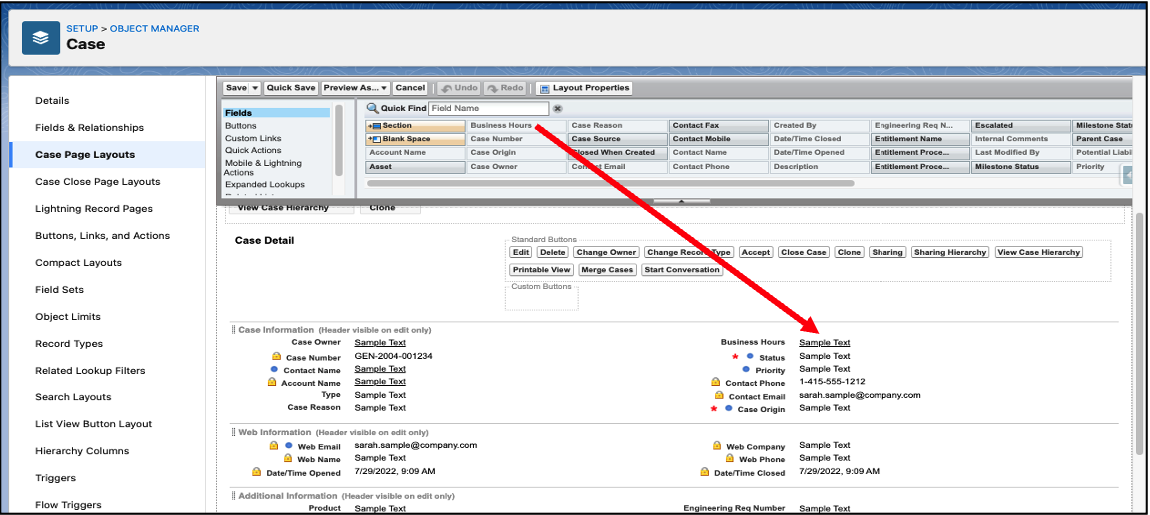
- Click Save.
- Repeat steps 2-4 for all Case page layouts that you’d like the Business Hours to display on.
Update Field Level Security
Lastly, we must update the Field Level Security for the Business Hours field on the Case object.
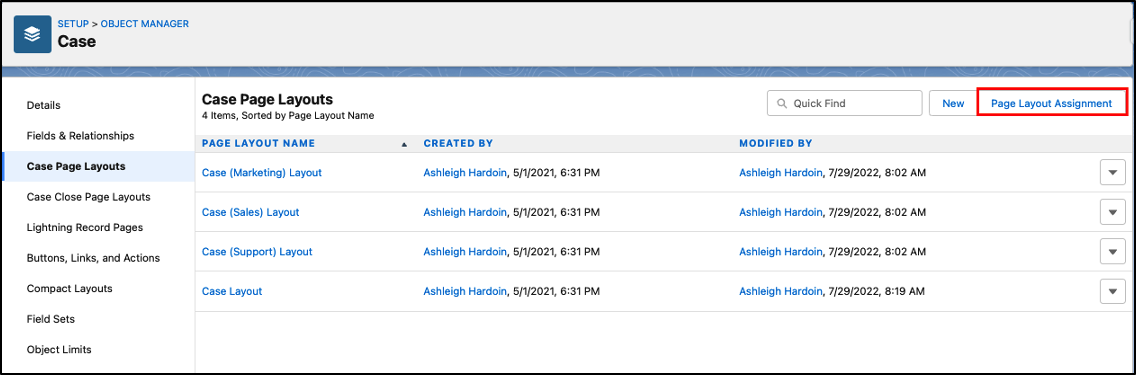
- While still viewing the Case Page Layouts section of the Case object, click the “Page Layout Assignment” button in the top right corner.
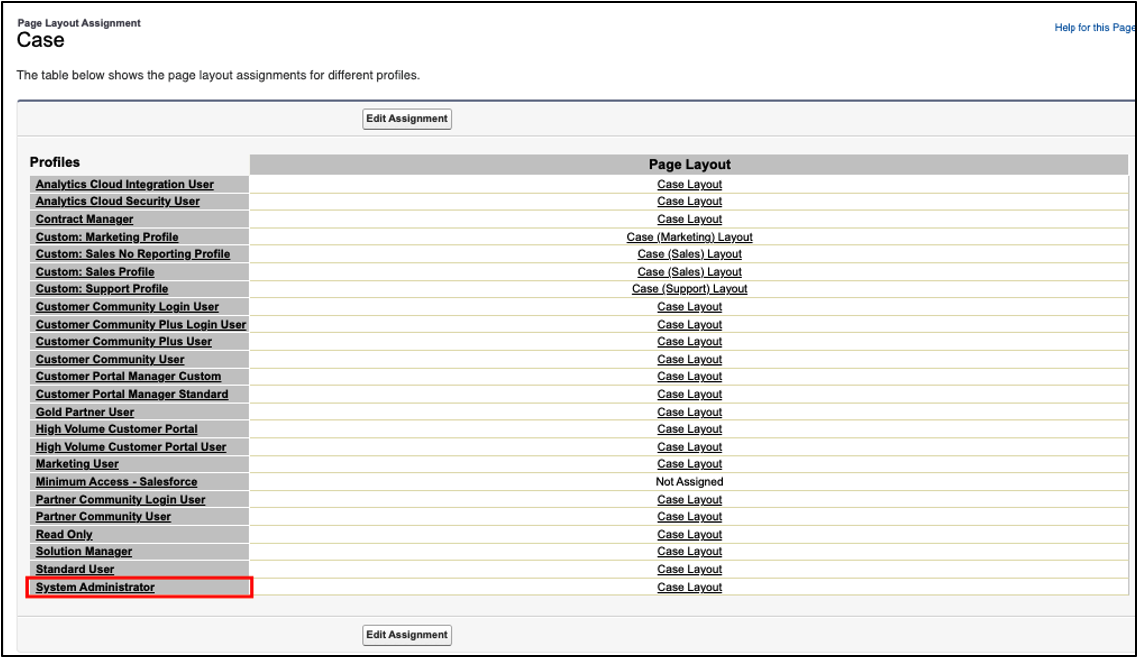
- Here, we can see assignments of the Case Page Layouts by Profile in Salesforce. We can also determine which Profiles need the Business Hours field level security updated depending on which layouts we added the Business Hours field to. For this example, we’ll just update the System Administrator settings.
- Click the System Administrator profile.
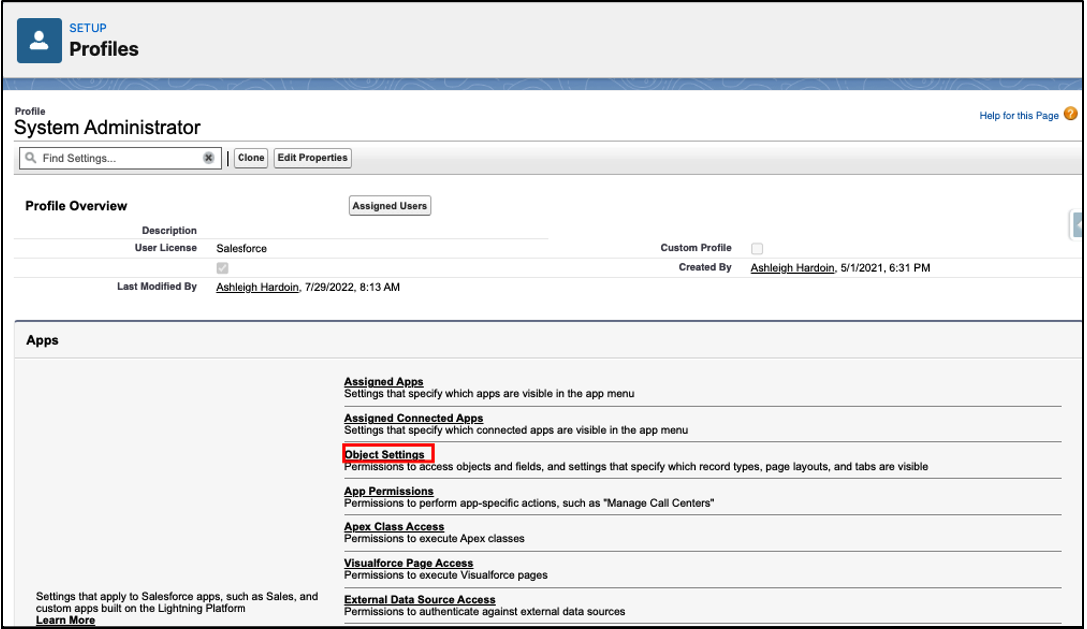
- In the System Administrator profile page, click Object Settings.
- Select the Cases object from the list.
- Click Edit at the top of the page.
- We want the System Administrator profile to be able to Read and Edit the Business Hours field. As a result, we’ll check both boxes in the Field Permissions section next to the Business Hours field. Note that for profiles that should not be able to edit the business hours on Cases, we should only check the Read Access box.
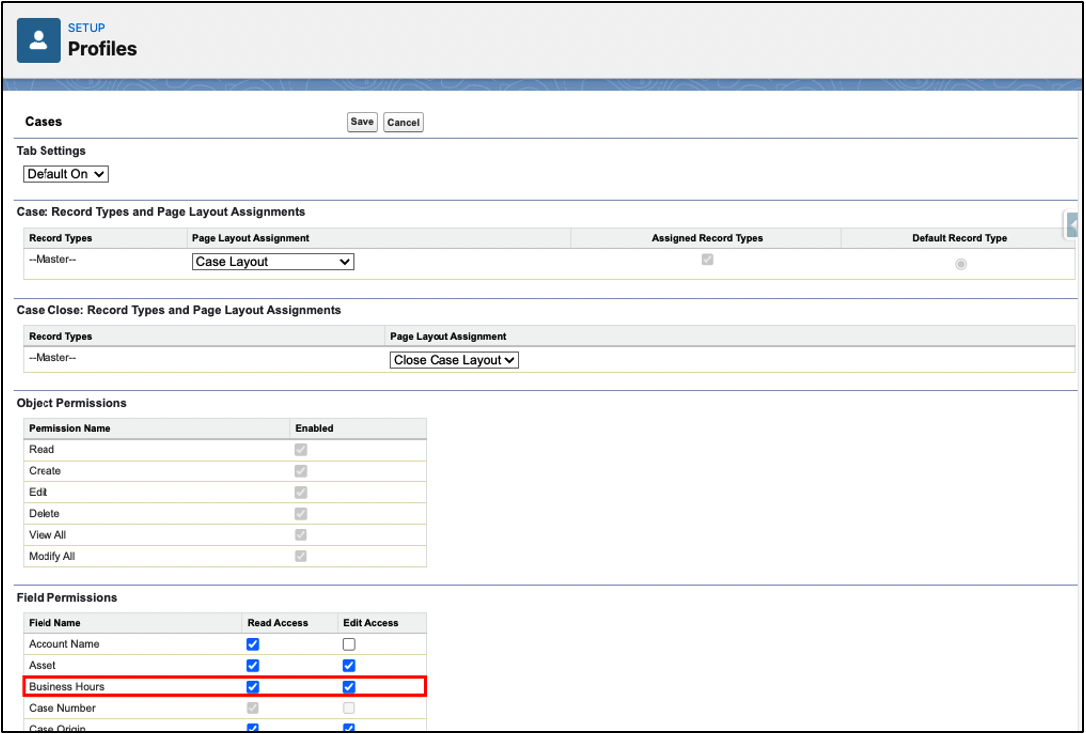
- Click Save.
Confirm Updated Layout Settings in Salesforce
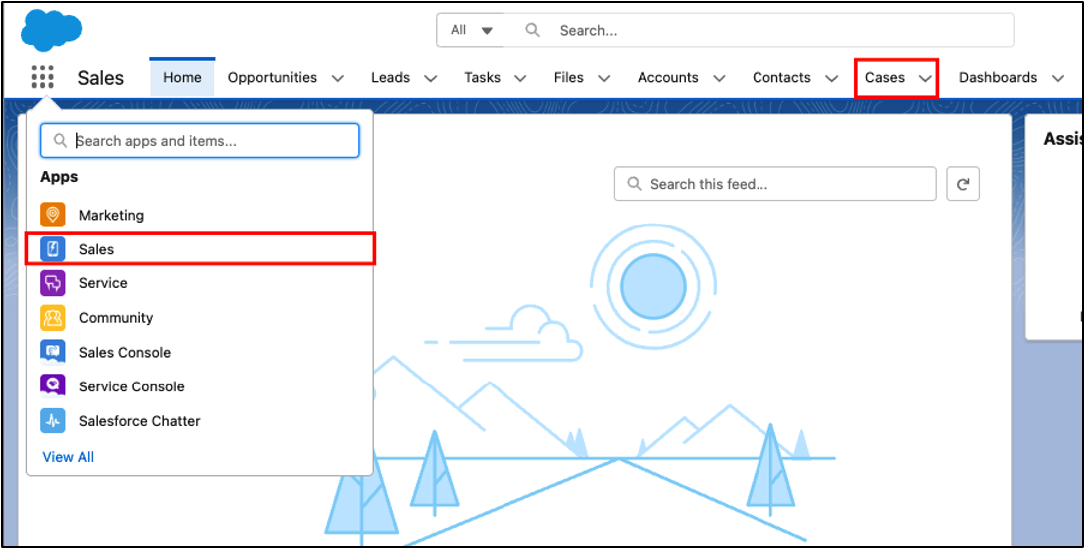
- Finally, to test the field and access that we’ve just updated, from the App Launcher, navigate to the Sales App and select the Cases object.
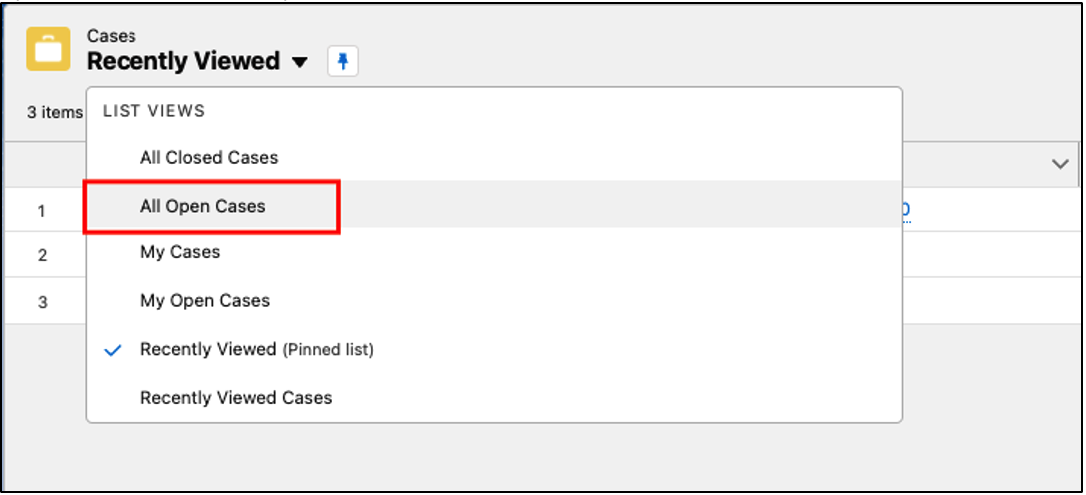
- Update the list view to “All Open Cases,” and select one of the cases from the list.
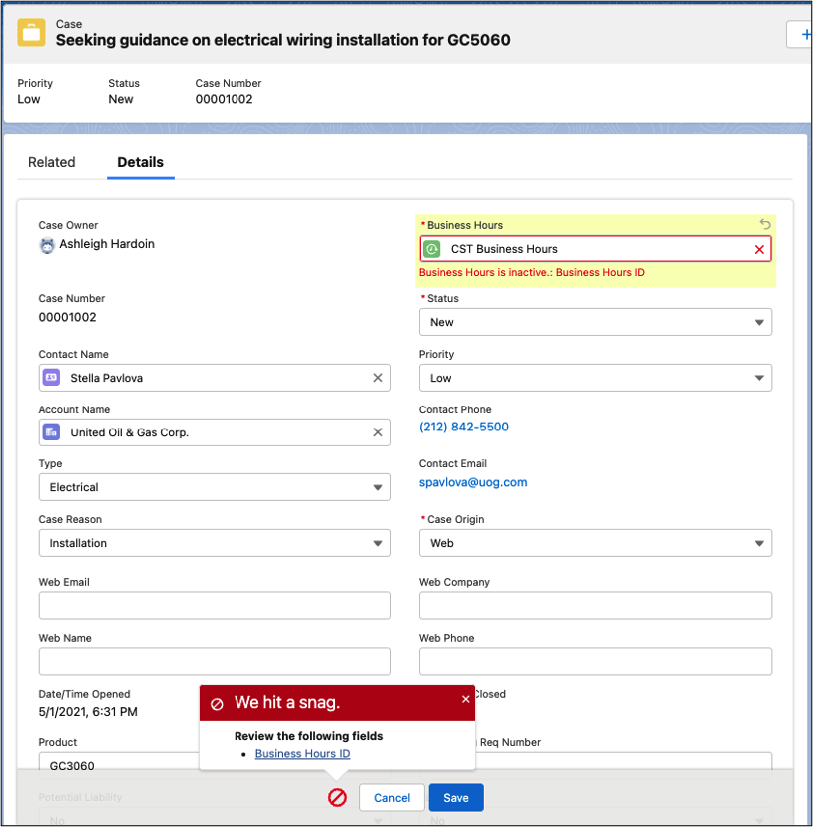
- Navigate to the Details tab of the selected case and view the Business Hours field that we’ve added to the Case page layout in Salesforce.
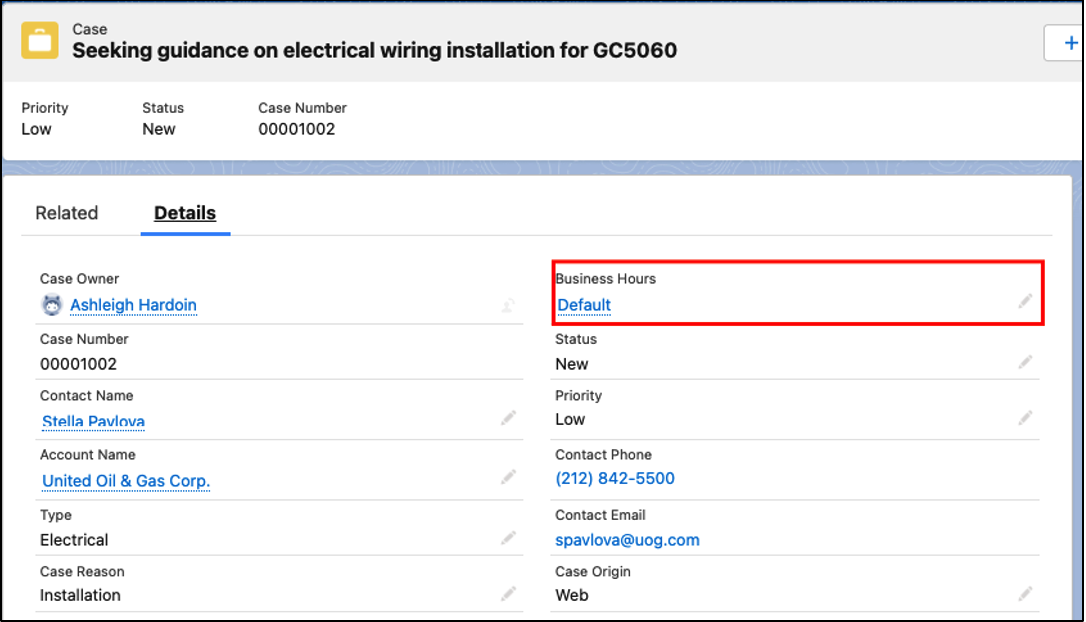
- From here, we can click the pencil icon next to the Business Hours field to edit the selection.
- If we attempt to select business hours that are not marked as Active in the Business Hours settings, we receive an error when we try to save the record.
- Also note that in the screenshot above, although the PST Business Hours were selected as the default business hours, we’re seeing a different selection on this case. This case was created before we created the PST Business Hours, so the previously selected business hours will not change unless updated manually or by an automated process.
- Select the new, PST Business Hours that we just created, and click Save.
Your new business hours are now visible on your Case!
Business Hours are an extremely useful tool, especially when it comes to the support objects and processes in Salesforce. They are not intended to restrict user access, but to help users across the organization understand when support users are available to assist customers.
Additional Resources
- Salesforce Business Hours
- Trailhead by Salesforce: Configure Business Hours, Working Days, and Roles
- Salesforce Help: Guidelines for Setting Business Hours
- Salesforce Help: Set Business Hours
Cover Photo by Mike Petrucci on Unsplash