
How to deploy your Boomi process to run at the scheduled interval?
The scheduling feature in Boomi allows you to automate your Boomi process to run with a defined frequency. Here are the 3 basic steps that are prerequisites to scheduling the process. i.e. boomi deployment steps before scheduling it.

Boomi Deployment Steps:
1. Build components:
By navigating to the Build page, we will build the process. Once this is done, we will define the extensions like Connections (to maintain a single version of code for all environments), Dynamic Process properties & cross-reference tables, etc.
2. Create Packaged Components:
Once extensions are defined, we can create a package for the process from the below two locations:
- The Build Page -> Open the Process -> Create Packaged Component
- Deploy Page -> Packaged Components -> Create Package Component
3. Deploy Package:
From the packaged components page, the user needs to go to the Actions🡪 Deploy and Select the “Deployment Environment”.
Boomi Scheduling:
- Once the above three basic steps are completed, you need to navigate to the below path:
Manage -> Atom Management -> (Select the Atom) -> Deployed Processes. Here you will see the list of deployed processes. Click on the Actions respective to the Process and click on the “Edit Schedules”. Here you can add a schedule based on the requirement.
- Similarity you can add multiple schedules with different timings by using the add schedule option.
- We can Stop/Resume schedules as well if required.
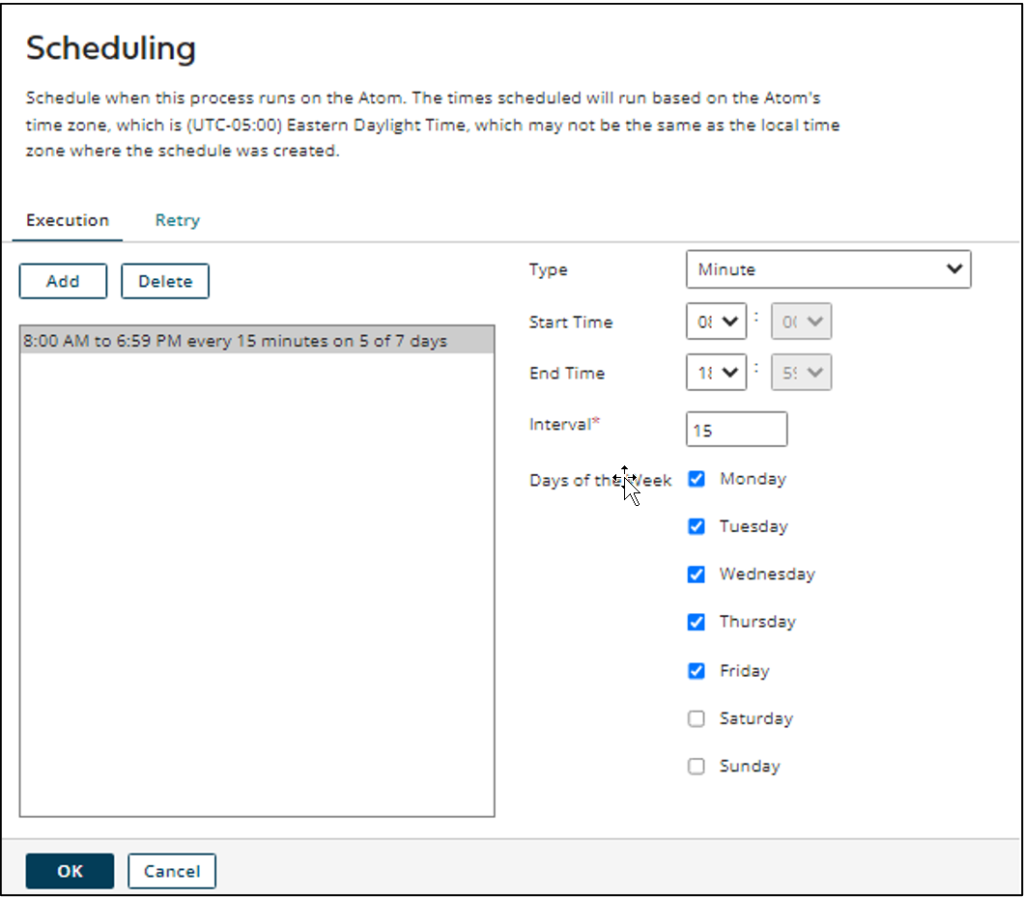
- When we click on the Edit Schedule option, we will get a Box with two options:
- Add Schedule
- Delete Schedule
- You can select the schedule by adding Minutes/Hours/Days Predefined values where we need to choose with start time, End Time, and Interval as required.
- Along with these there is an Advanced Scheduled option also available. Using these, we can manually define all Days/Hours/Minutes/Intervals as required.
Once you add the schedule, Boomi will take care of the Execution.
Cover Photo by Jo Szczepanska on Unsplash