
In this blog, I will walk through the high-level process to create Product Features in CPQ. A Feature is attached to a Product in CPQ and lives on an object that has a direct relationship to the Product. These Features reside within a bundle in CPQ. One important thing to note about Product Features is that there can be multiple Features within a bundle or there could be 0 depending on the use cases of your users and business.
In this blog we will walk through the steps to create a Product Feature relating to a product that already exists. First navigate to the Product that you want to associate the Feature to and click the Related tab.

Once you click the New button you will see a pop up window that requires some information. That window looks like this:
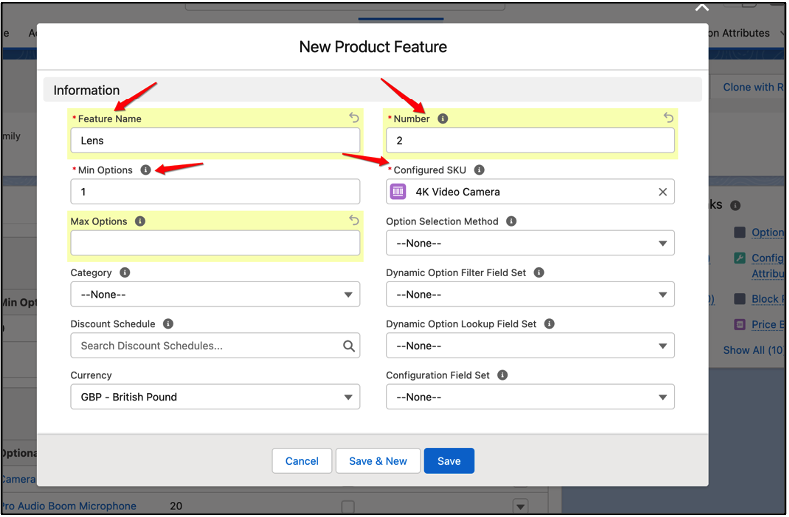
For the Feature name you will enter what you want the users to see the Feature called when the are selecting it. Ensure that the Min Quantity is set to at least 1 – if it is set as 0 then the system will allow the users to progress without selecting the feature. Number relates to the display order of the Feature. Keeping this list clean and organized as you add more Features to the Quote Line Editor is very important. Finally the Configured SKU is the lookup to the Product that you clicked New from. This links the Feature to the proper Product.
The final step of creation of your new Product Feature is to assign it to the correct Product Options that are in place. To do this, navigate to the respective Option and click edit.
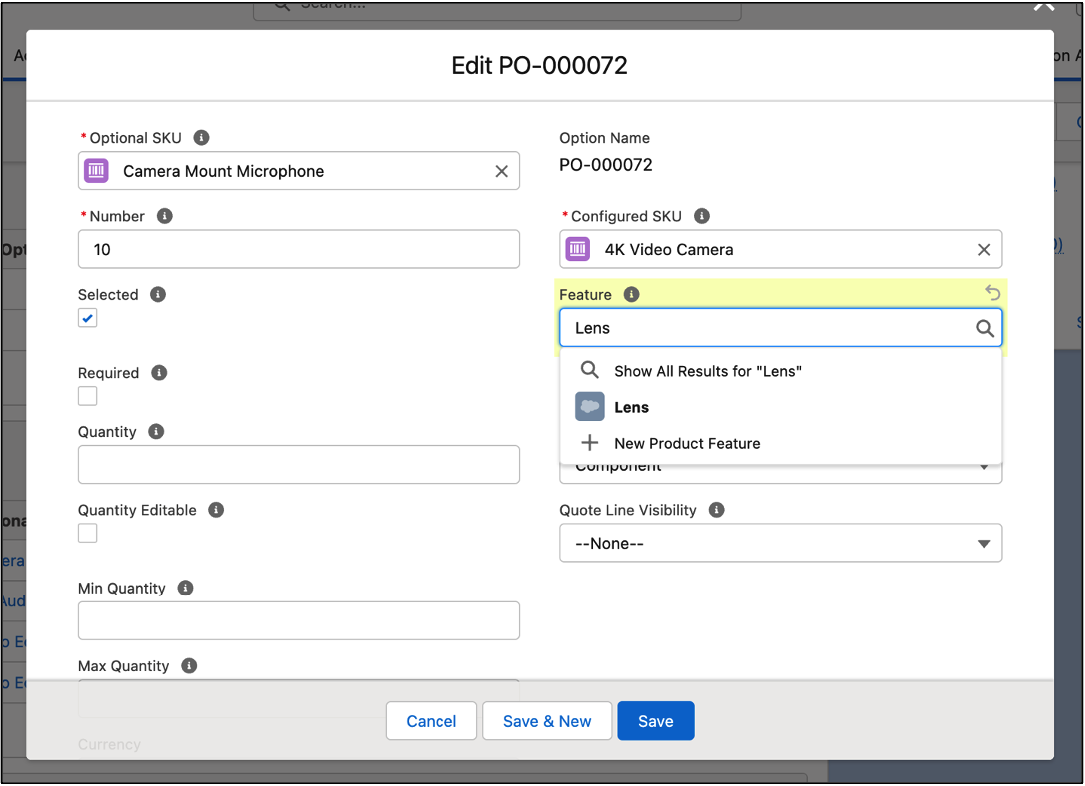
Here I have updated the Feature field to the Lens Feature that I just made in order to better categorize my Product Options. In a future blog post we will walk through how to create Product Options.
To learn more about CPQ, check out some of my related blogs below.
Additional Resources
- Salesforce CPQ Product Options
- Salesforce CPQ Configuration Attributes
- Trailhead by Salesforce: Use Features to Organize Options
Cover Photo by Mick Haupt on Unsplash