
Transfer Order Integration
This article will go through the SFDC to NetSuite Transfer Order Integration.
The Difference between this and the Sales Order Integration will be in NetSuite whereas on Salesforce everything remains the same. in Salesforce you could create a flag like Order Type and keep the values as Transfer/Sales to determine where it should go in NetSuite.
Transfer Order is usually used for the internal transfer of Products between different locations or Warehouses of the Company and thus doesn’t have a Customer, unlike Sales Orders.
We will go through all the steps needed in Boomi to Implement this.
How to Fetch Orders from SFDC:
Once an Order is created in Salesforce you can get it in Boomi by performing the following steps:
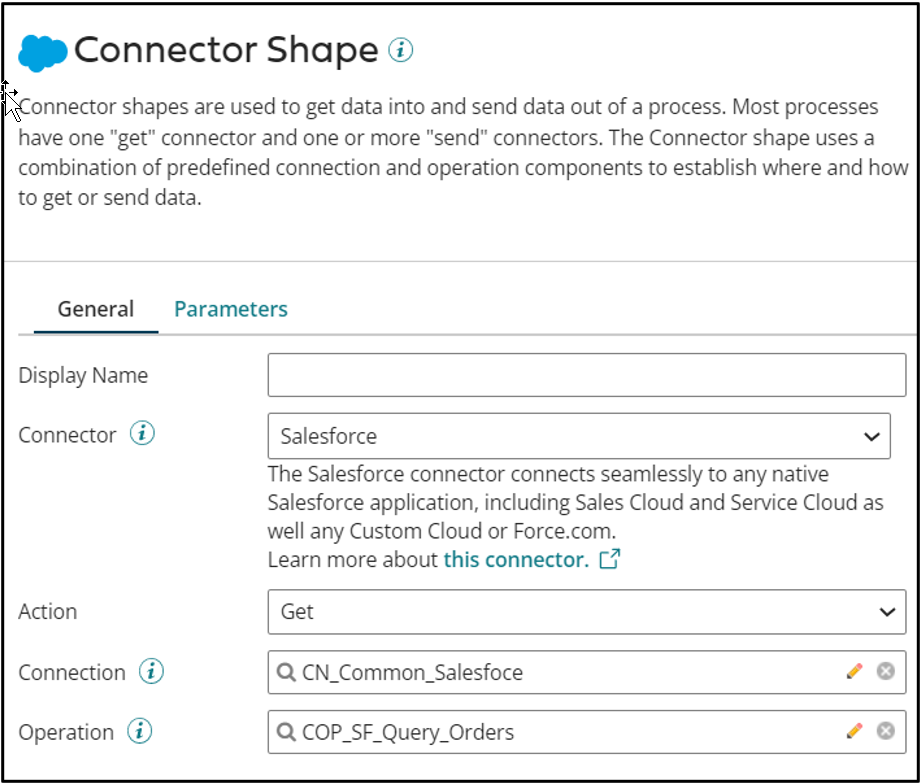
Action: Get
Connection: Select the common connection you have in your Account
Operation: Create a new operation by following the steps below.
- Click on the Import button at the top right of your screen
- Select the common SFDC Connection and click on next
- The object Type should be Sales Order and Action should be Query.
- If you are to fetch Parent/Child objects then don’t checkbox the Skip import of parent/child hierarchy
- From the Child, Object select the Order Product object
- Once completed Boomi will fetch the Schema of the Order and Order Product object of SFDC
- It is a recommended practice to select only the fields that you would need for your integration as circled in the screenshot below:
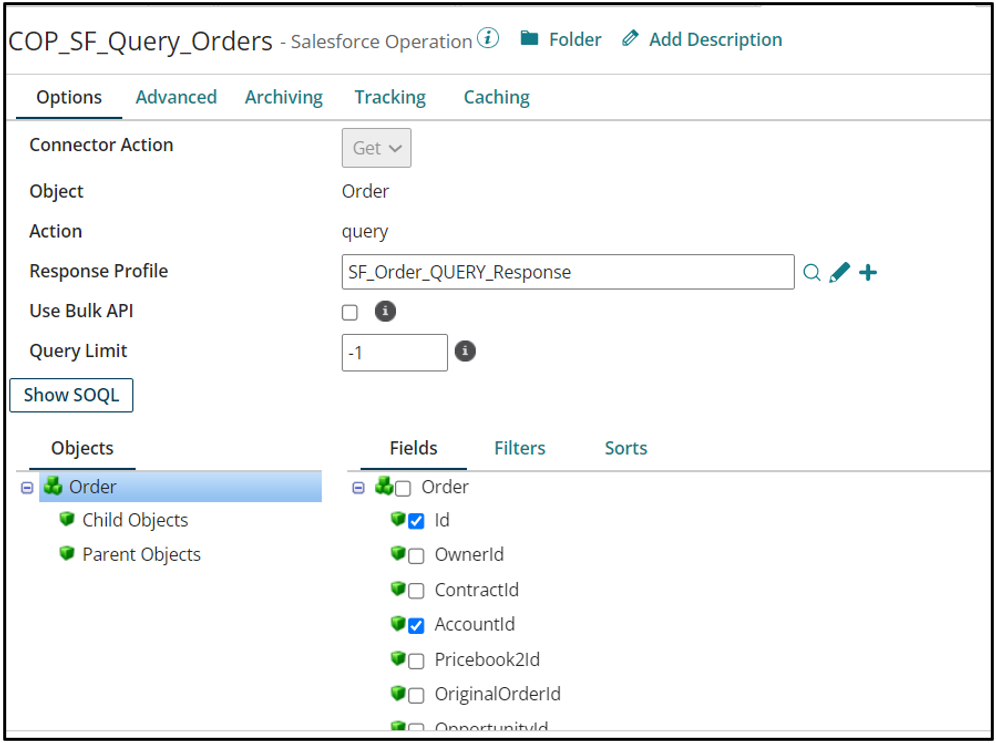
Once you have selected all the fields review the query by clicking on Show SOQL.
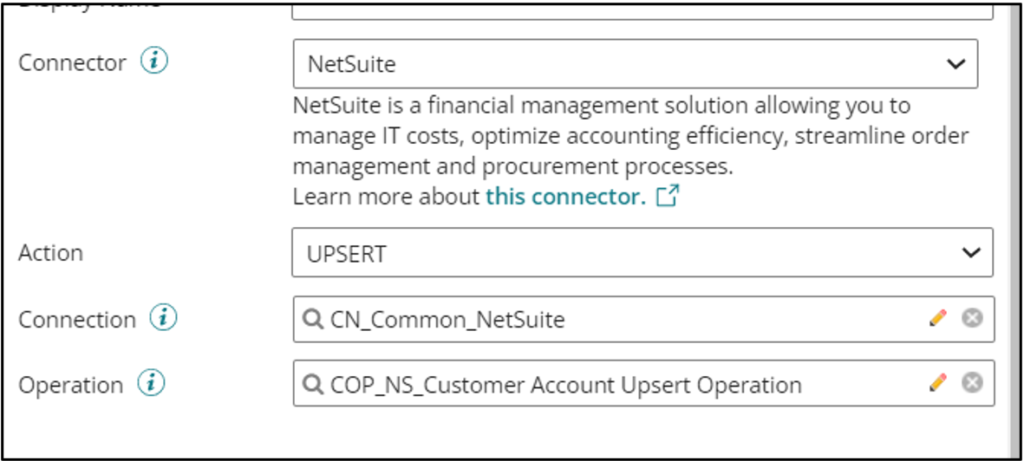
How to send data to NetSuite:
Before you do the SFDC to NetSuite mapping you need to import the NetSuite Profile. Based on the requirement, you would create/Update/Upsert to NetSuite. The recommended action for creating Transfer Orders in NetSuite is Upsert.
The configurations could be as below:
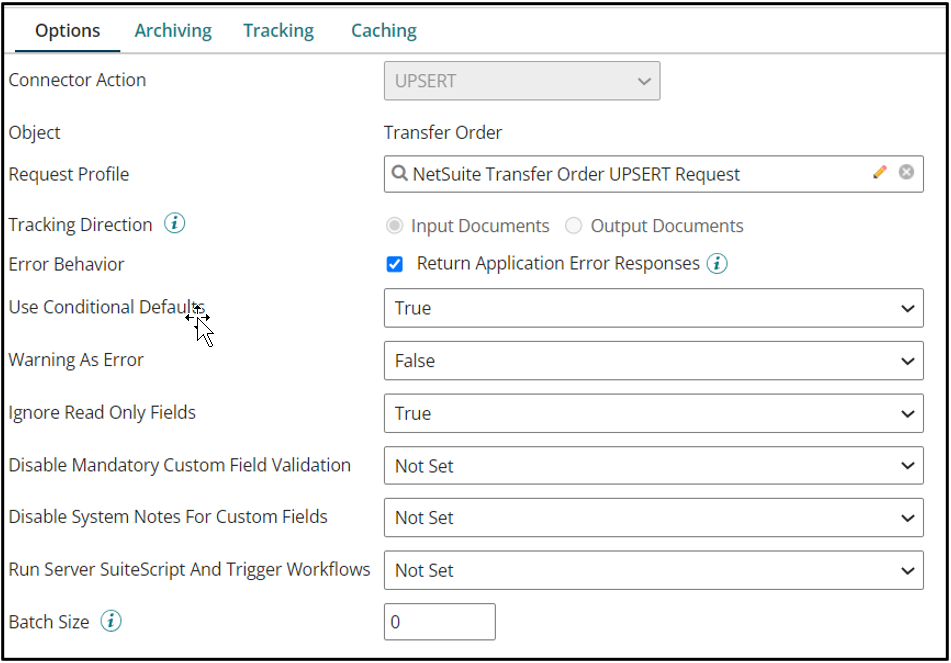
You need to specify the Action (Create/Update/Upsert) when you configure the connection:
Performing the Mapping
Once both the source and target profile are imported you need to start your mapping.
Drag the map shape from the shapes palette and choose the source and target profile.
Below is a snapshot of an example of the mapping fields needed in NetSuite:
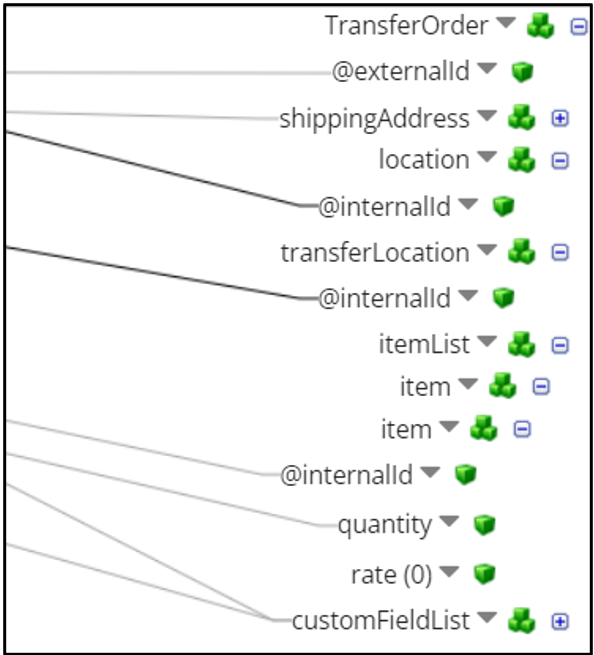
Following are key fields that you need to remember while mapping:
- External ID is mandatory to perform Upsert in NetSuite. You could use the Salesforce 18-digit Id as the NetSuite external id.
- Any order has an Order Header and Order Line Items. Transfer Location (to location) and location (From Location) are the mandatory fields while doing Upsert on Transfer Orders in the Header Level.
- To add items to NetSuite Order you need to map either the Item’s Internal Id or map the Item name.
- Along with the item you need to specify the Quantity and keep the Rate at zero
- Apart from this map all the other fields based on your requirement and make sure you map any mandatory fields that you have set up in NetSuite.
Additional Resources:
- Boomi –> Saleforce Netsuite Product Integration
- Boomi –> Saleforce Netsuite Customer Integration
- Boomi –> Saleforce Netsuite Sales Order Integration
Cover Image by tirachardz on Freepik