As discussed in part 1 of the Schema Builder blog series, Schema Builder in Salesforce can be used to modify your org’s data model by editing and creating custom objects and fields. Today, we’re going to practice utilizing Schema Builder to do just that!
Note: To follow along with the steps below, use or create a Playground from Salesforce Trailhead or a Developer Edition org.
Create a Custom Object
- Once in your Salesforce org, click the gear icon to open the Setup menu.
- In the Quick Find search box, search for “Schema Builder” and select to open it.
- In the panel on the left side of the screen, select the Elements tab.
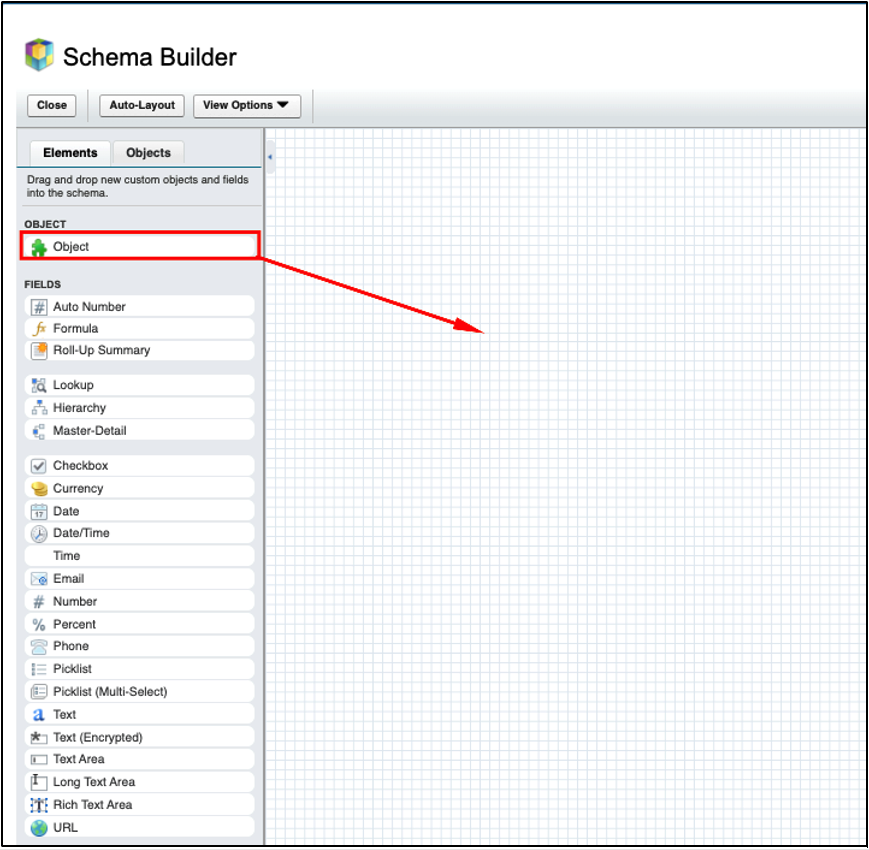
- Next, drag and drop the Object icon from the panel to the canvas.
- A “Create New Object” window will pop up on the canvas – enter your new object information as follows:
Field Value Label Property Plural Label Properties Allow Reports Check Add Google Docs, Notes and Attachments related list to default page layout: Check 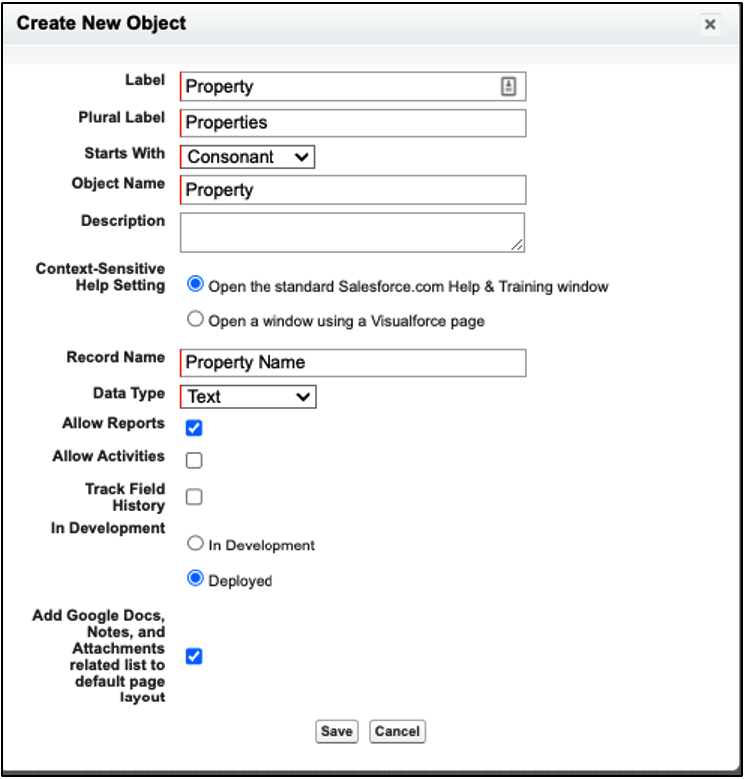
- Then click Save.
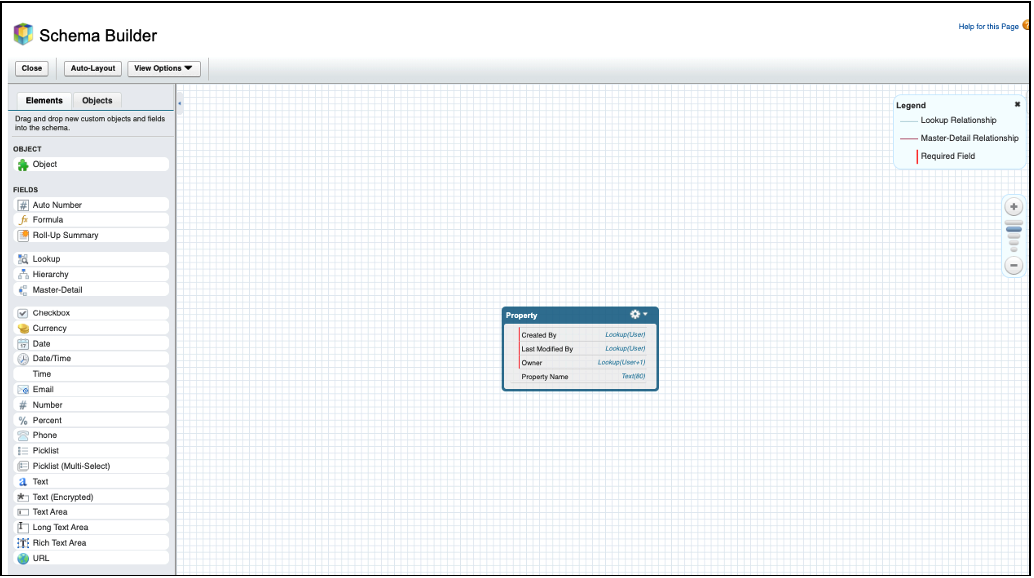
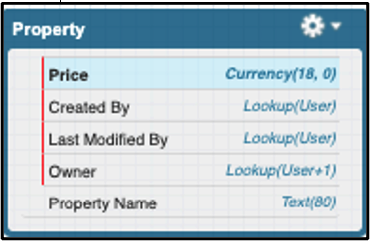
Now you can see your new, custom object on the canvas. The Legend also shows fields with a red vertical line next to them. Those are required fields that must be completed for your new object.
Next, let’s create a custom field on our new, custom object.
Create a Custom Field for the Object
- Select the Currency icon and drag and drop that on top of the Property object.
- A “Create Currency Field (Object: Property)” window will pop up on the canvas – enter your new field information as follows:
Field Value Field Label Price Field Name [defaults to ‘Price’] Description The listed sale price of the home. Required Check 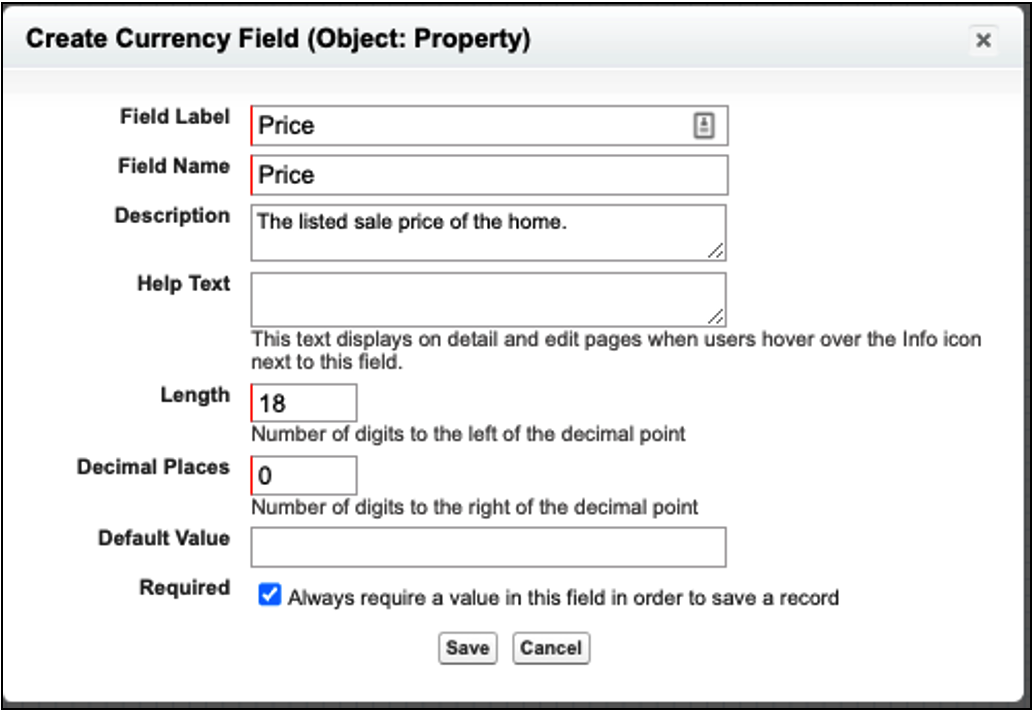
- Then click Save.
Now you can also see your new, custom field included in your Property object with a red, vertical line next to the Field Label. As previously mentioned, the red line is indicating that it’s a Required Field.
Next, let’s create one additional custom object that we’ll then relate to the Property object.
Create Another Custom Object and Field
- Enter the below information for the new, custom object:
Field Value Label Offer Plural Label Offers Description Offers related to a Property. Record Name Offer Number Data Type Auto Number Display Format OF-{0000} Starting Number 0001 Allow Reports Check Track Field History Check Add Google Docs, Notes and Attachments related list to default page layout: Check 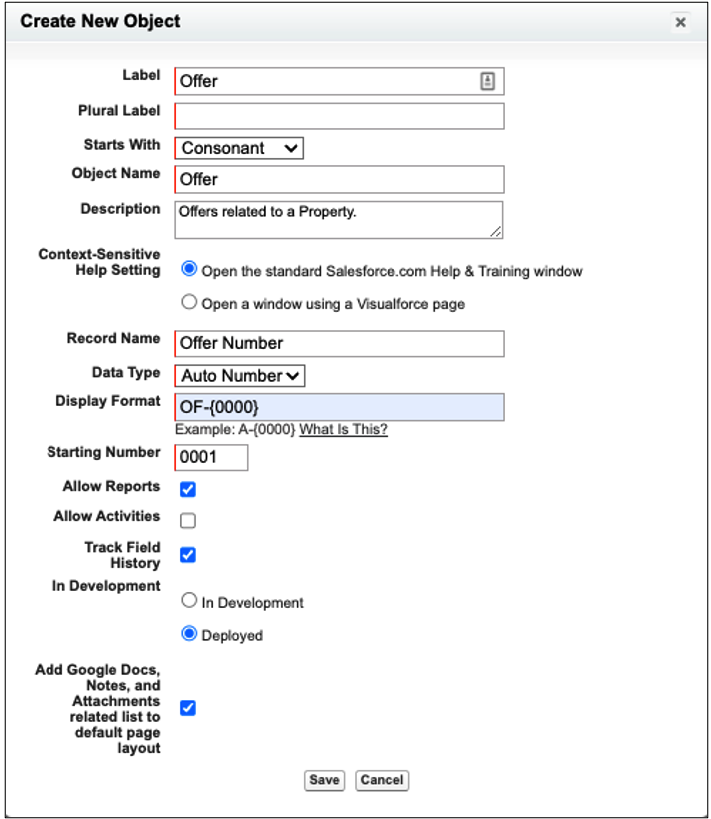
- Click Save.
- Then enter the below information to also add a custom field to the new, Offer object:
Field Value Field Type Currency Field Label Amount Field Name [defaults to ‘Amount’] Description Amount of the offer for a property. Required Check
Relate the Two Objects
- Now, create a Master-Detail relationship between the Property object (Master) and the Offer object (Detail).
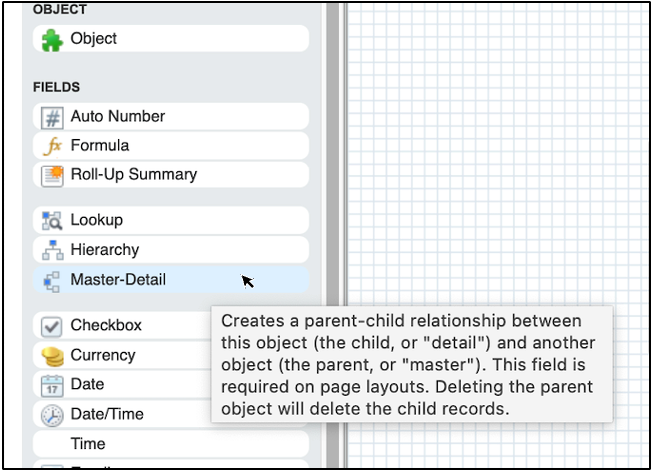
- When creating Master-Detail relationships in Schema Builder, we want to start the relationship from the child object and relate it to the parent object. Therefore, you need to select the Master-Detail icon and drag and drop that on top of the Offer object to properly relate the two objects.
- Fortunately, hovering over the Master-Detail icon provides information about what object we should start the relationship from, so there’s no need to memorize this.
- Complete the following information for the relationship field:
Field Value Field Label Property Field Name [defaults to ‘Property’] Related To Property 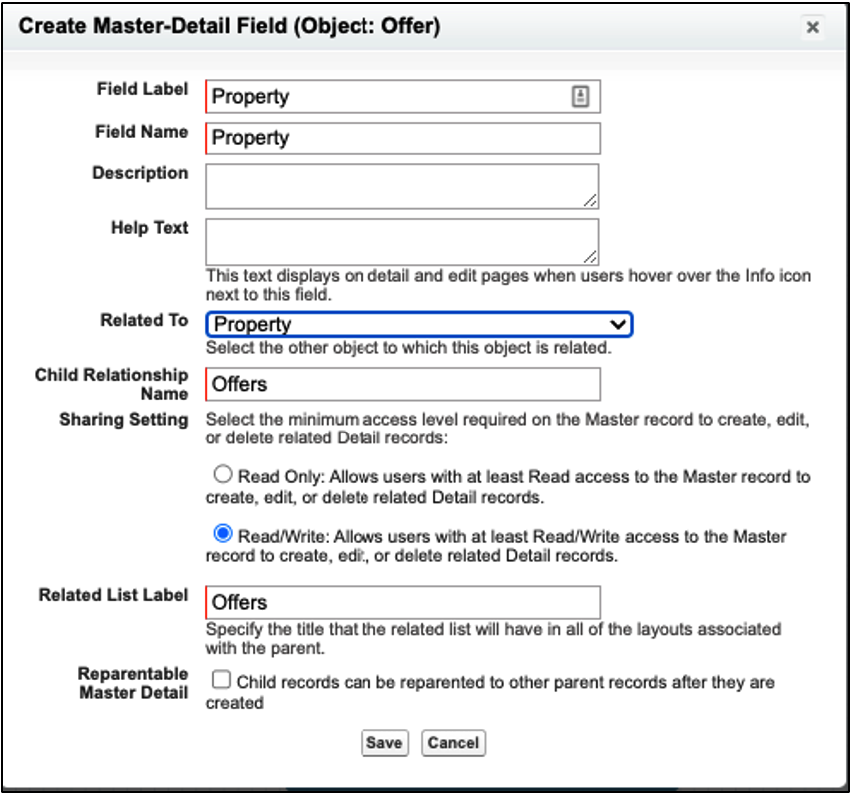
- Ultimately, what this relationship is doing is creating a field where we can look-up the Property record an Offer is related to.
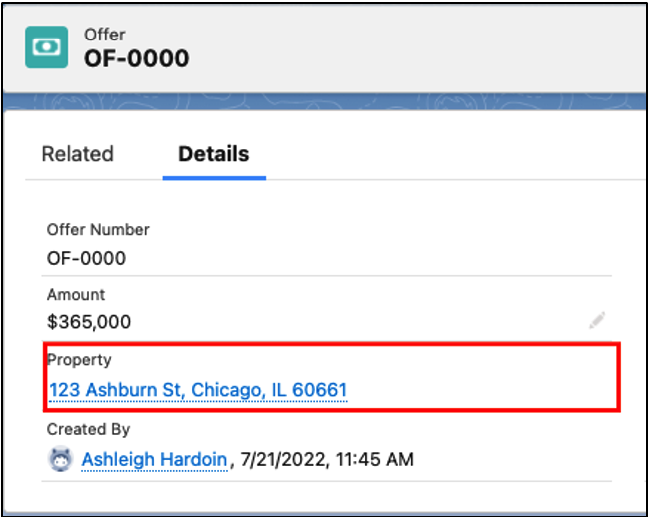
- The Child Relationship Name and Related List label are displayed on the corresponding Property record when the Offers related list is added to the Property page layout.
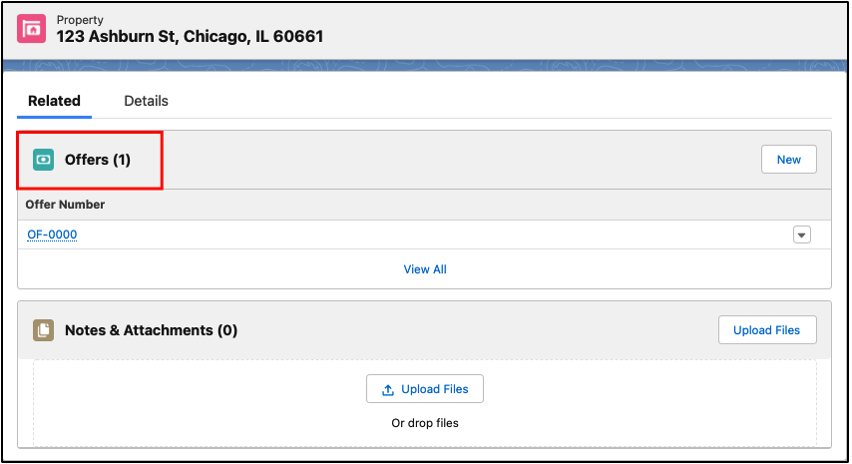
- Ultimately, what this relationship is doing is creating a field where we can look-up the Property record an Offer is related to.
- Click Save.
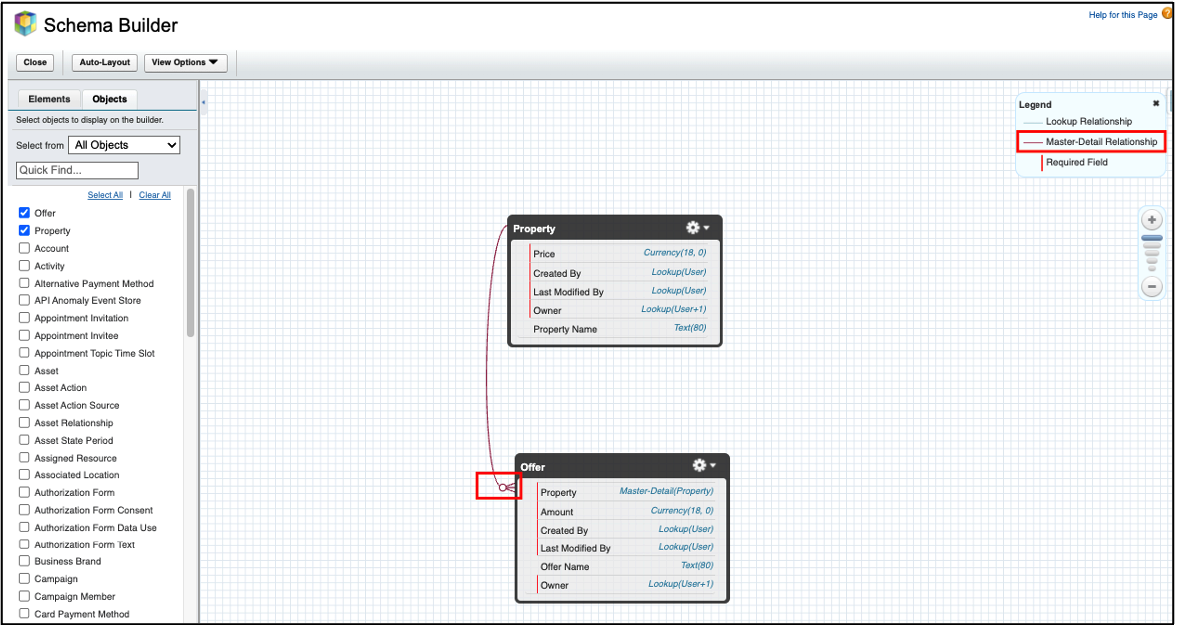
On the canvas, we can now see that the Property object and the Offers object has a Master-Detail relationship connecting them as indicated in the Legend by the maroon line.
We can also see that the relationship line on the canvas indicates that we’d have a single parent record to possibly many child records by the branched connection to the Offer object.
Create Tabs for the New Objects
Next, let’s create Tabs for our custom objects so we can easily navigate to them.
- Click the Close button in the Schema Builder header
- In the Quick Find search box, search for “Tabs” and select to open it
- In the Custom Tabs section, click the New button
- For Object, select Property from the dropdown list
- For Tab Style, click the magnifying glass to select an icon
- Click next, next, and save.
- Repeat steps 18 – 21 for the Offer object
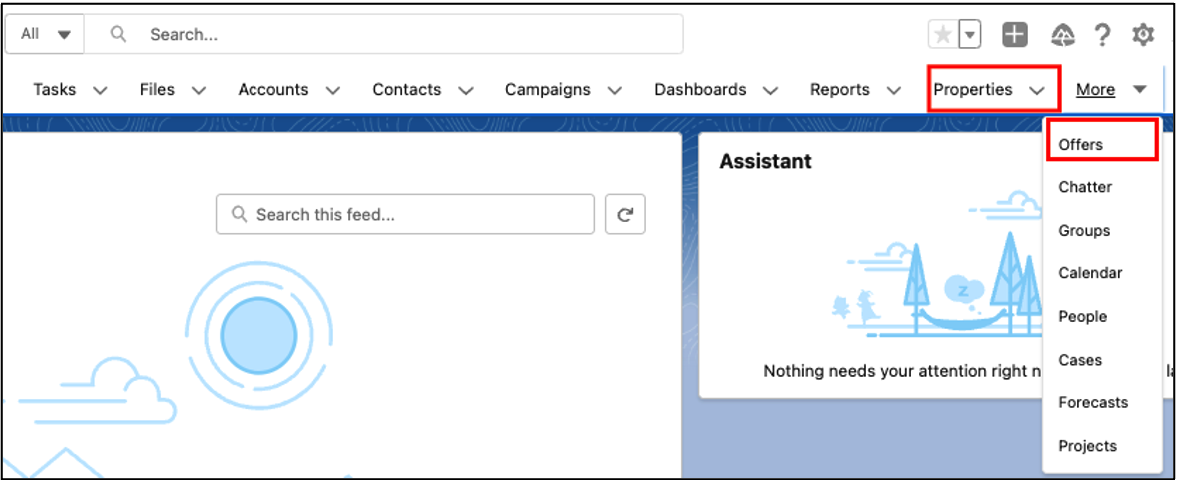
Now, we can easily locate our two new objects in our navigation menu and create records for them if we want.
Schema Builder in Salesforce is a great way to view and update your org’s data model. The visual aspects of Schema Builder also allow us to show the design of our data model to other users for a better, faster understanding.
Additional Resources
- Previous Schema Builder blog: Schema Builder pt. 1: What is it?
- Trailhead by Salesforce: Working with Schema Builder
- Salesforce Help: Design Your Own Data Model
Cover Photo by Raoul Ortega on Unsplash

